How to Draw a Bike in 12 Steps
A Complete Guide on How To Draw a Bike in 12 Steps
Draw to Marks
A Complete Guide on How To Draw a Bike in 12 Steps Add marks to represent the middle of each wheel - drawing a small X will work as a mark.

Draw Two Circles
Add a circle for each wheel - the gap between the wheels should be about as wide as the radius of one wheel.

Draw Another Mark
Now place a mark between the center of the two circles, closer to the left circle - a simple X will work as a mark.

Draw an M
Draw the letter ‘M’ between the circles connecting the bottom points of the M to the three marks you’ve made so far.

Draw Two Horizontal Lines
Draw a horizontal line connecting the two high points of the M. Draw a horizontal line connecting your left most mark and the middle mark.

Draw Two Small Circles
Draw small circles in the middle of each wheel.

Draw More Lines
Double the lines of the bike frame. This will add volume to your bike.
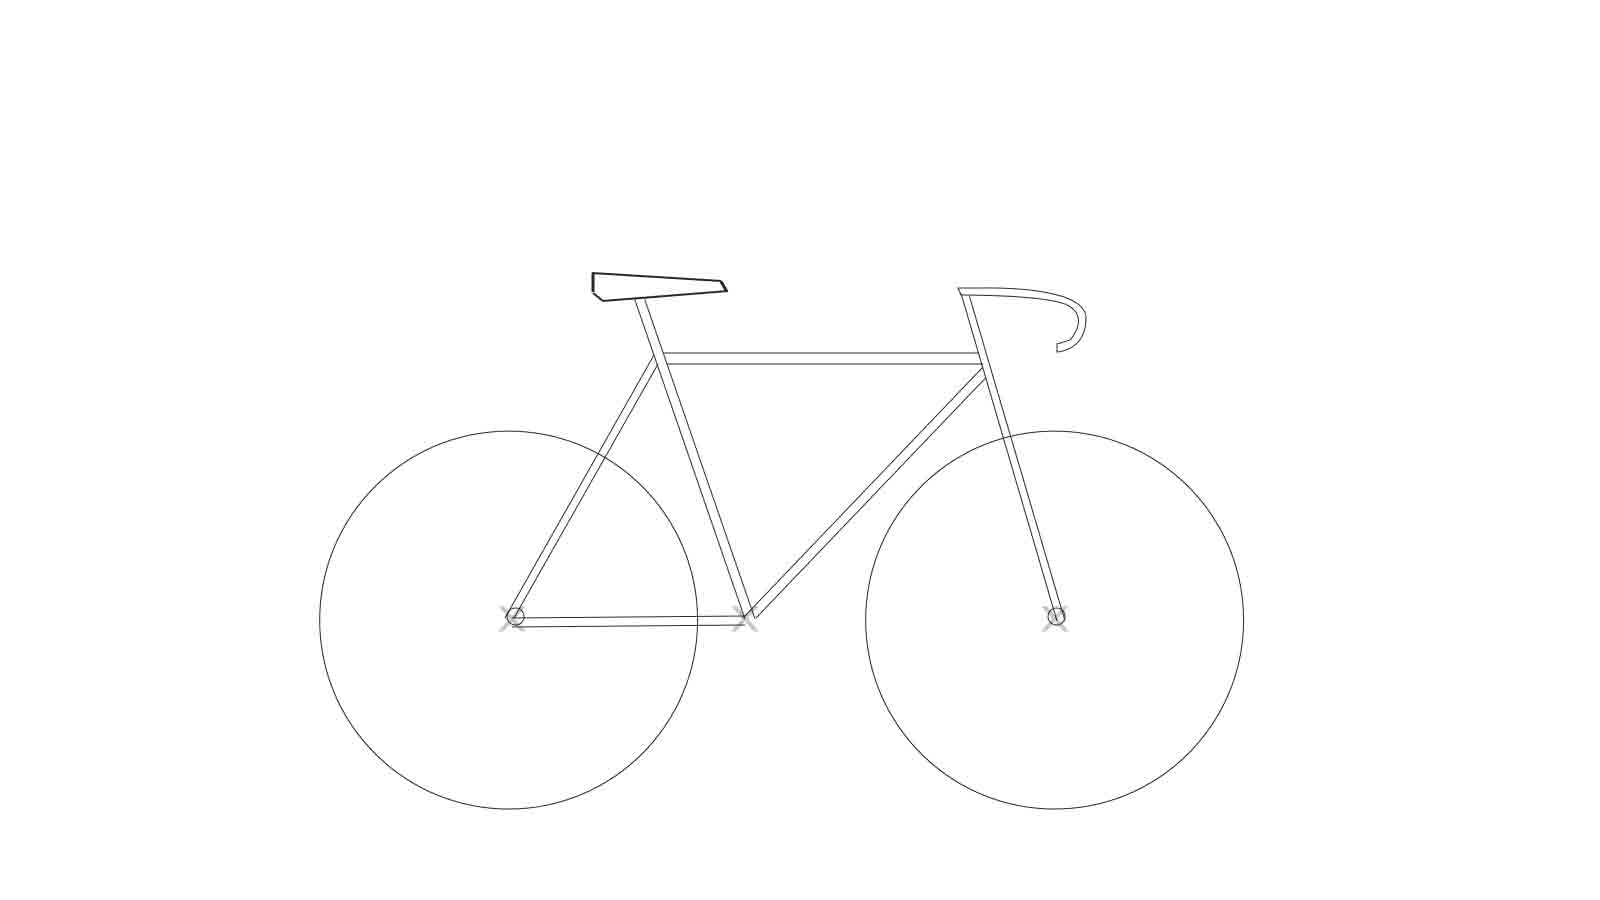
Draw Your Seat
Add a seat and handle bars. You can stylize your seat and handle bars as you wish.
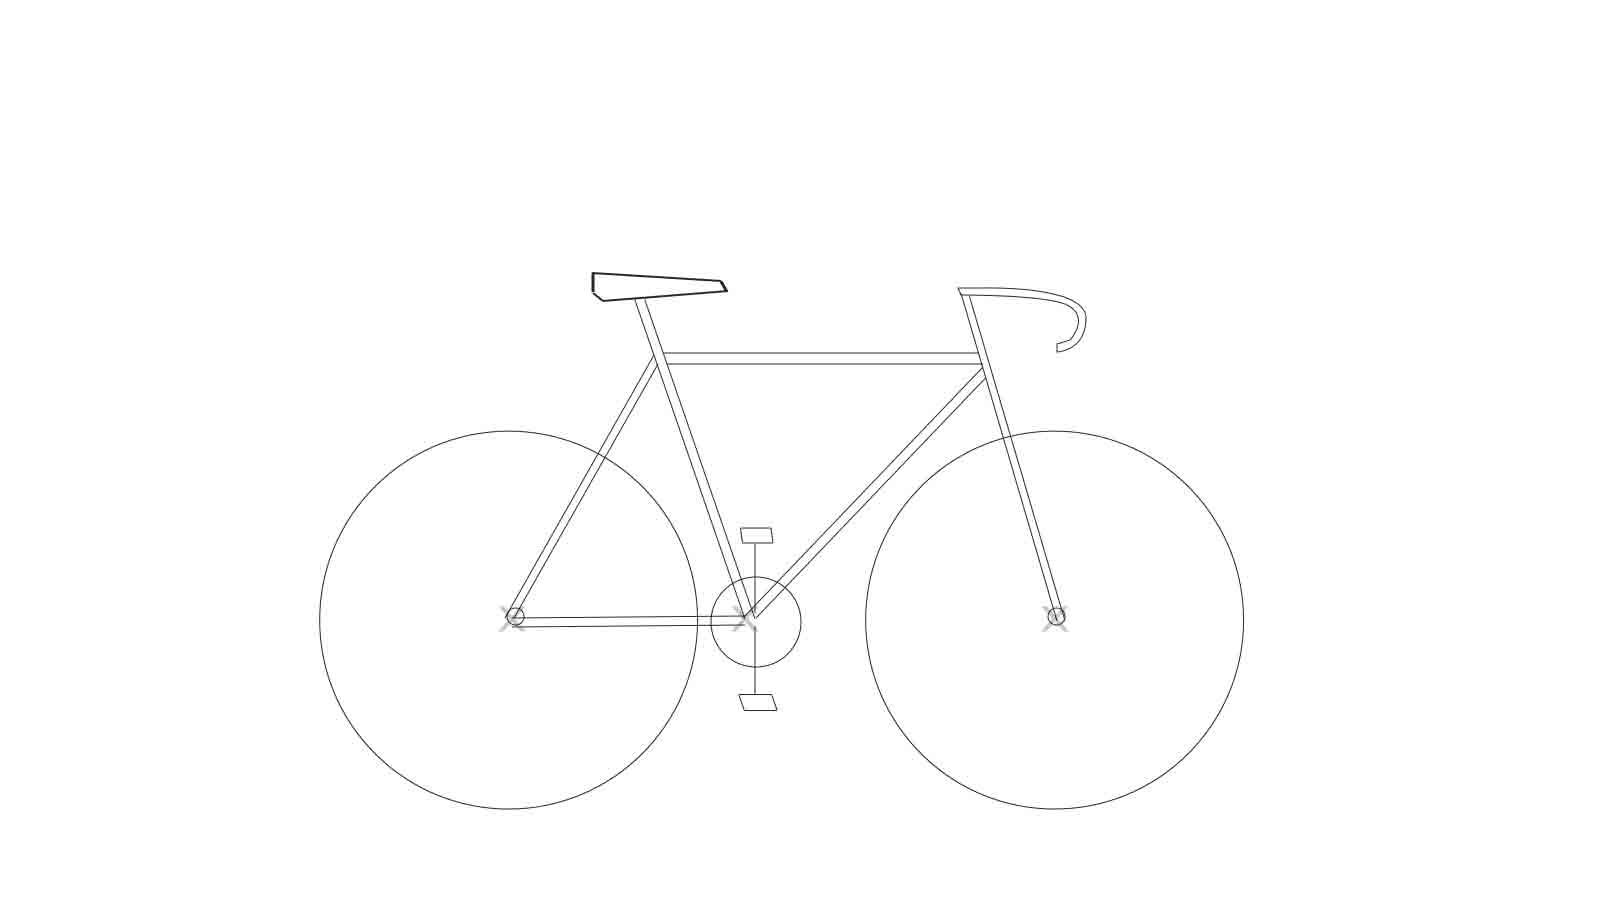
Add Gears and Foot Pedals
Draw a circle for the gear wheel and add foot pedals.
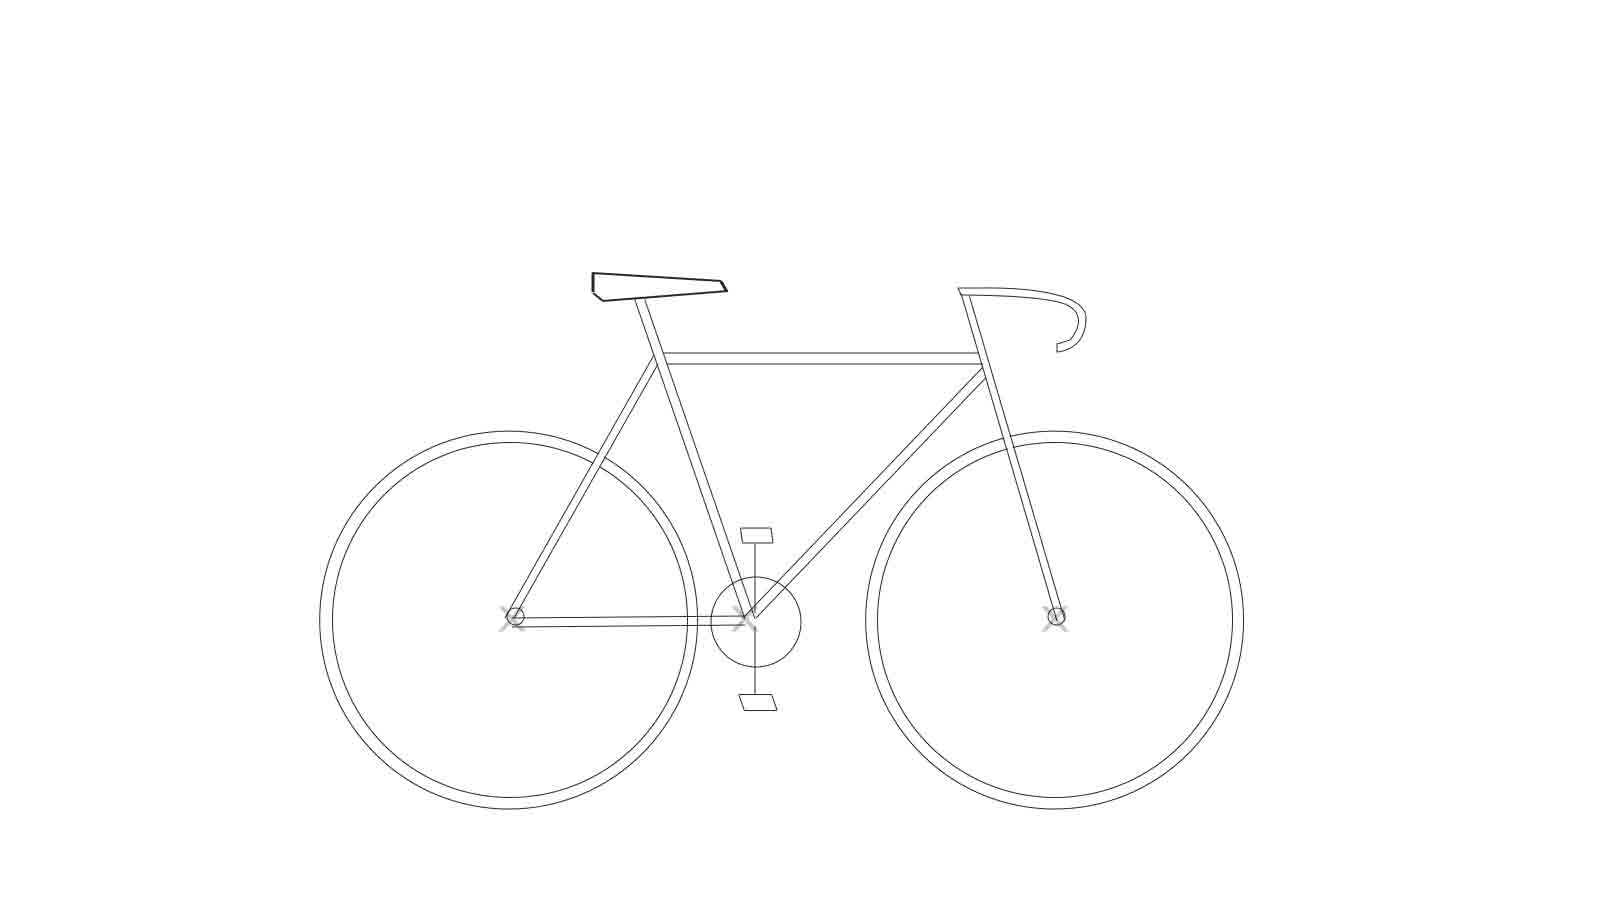
Draw Two Inner Circle
Add an inner circle for the bicycle wheels.
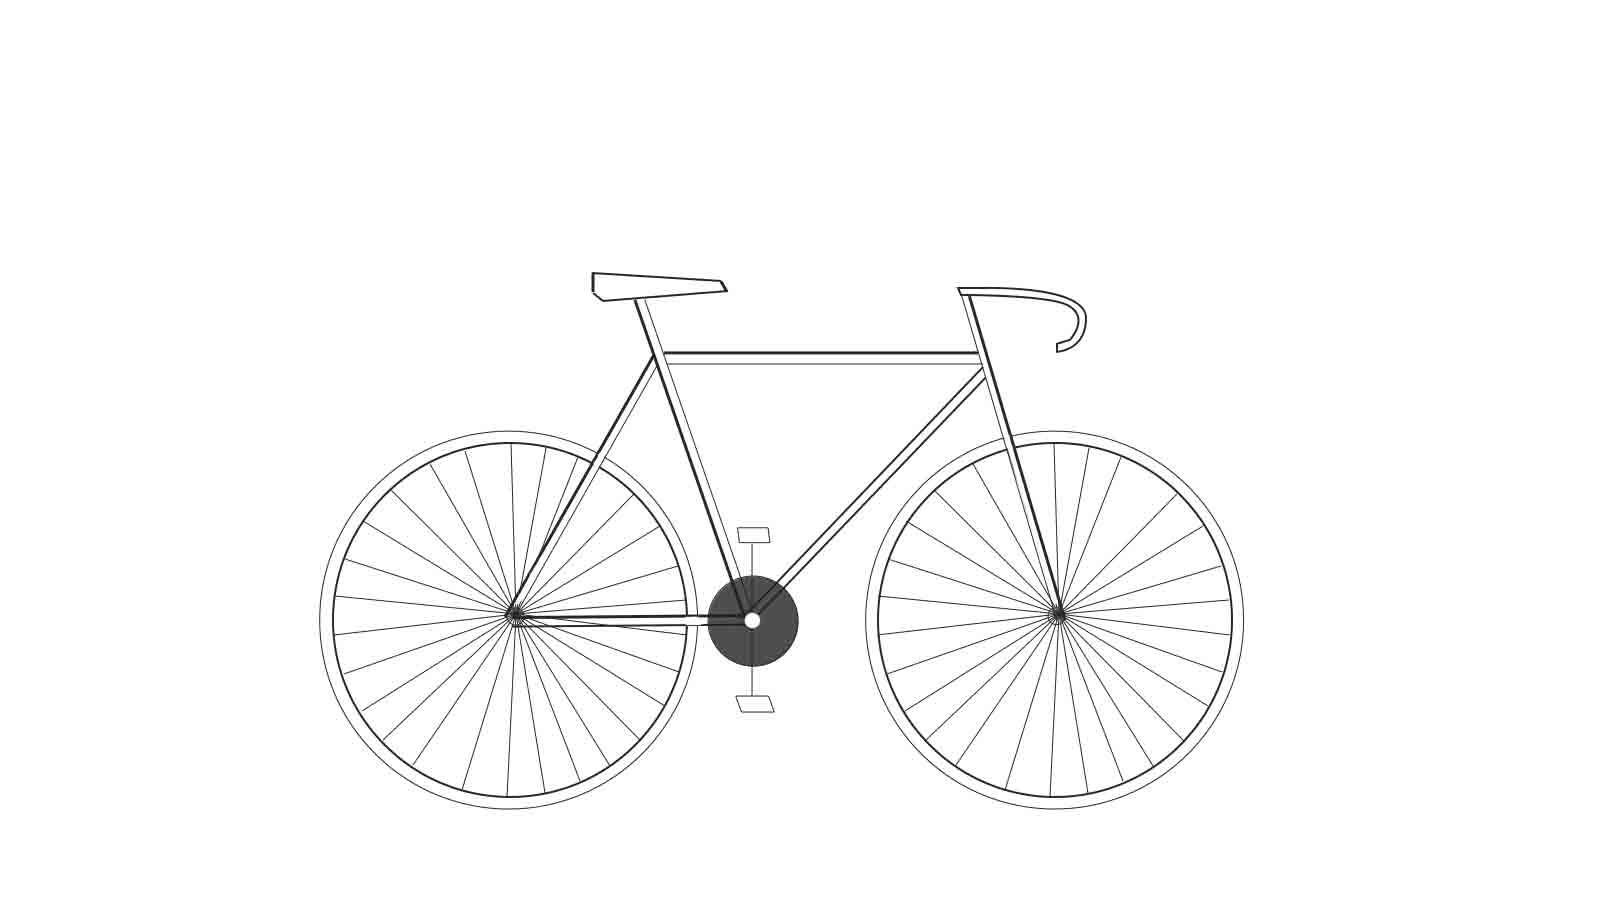
Draw Spoke
Complete your wheels by adding spokes.

Finish with shading
Add definition and shading to bring your drawing of a bicycle to life.
Join Our Exclusive Mailing List for Insider Access to Exciting Updates and Valuable Resources Delivered Directly to Your Inbox